Connect to NX1P
This article will use the Omron FINS UDP plugin to connect to the Omron NX1P PLC for reading and writing point positions within the PLC.
The Omron FINS UDP plugin requires connection to the Omron PLC via the local area network, so please ensure that the PLC and Neuron are in the same local area network.
Prerequisites
This section assumes that It is already possible to use Omron Programming Software Sysmac Studio to connect to the Omron NX1P PLC and view the point positions in the PLC.
Get PLC Point Positions
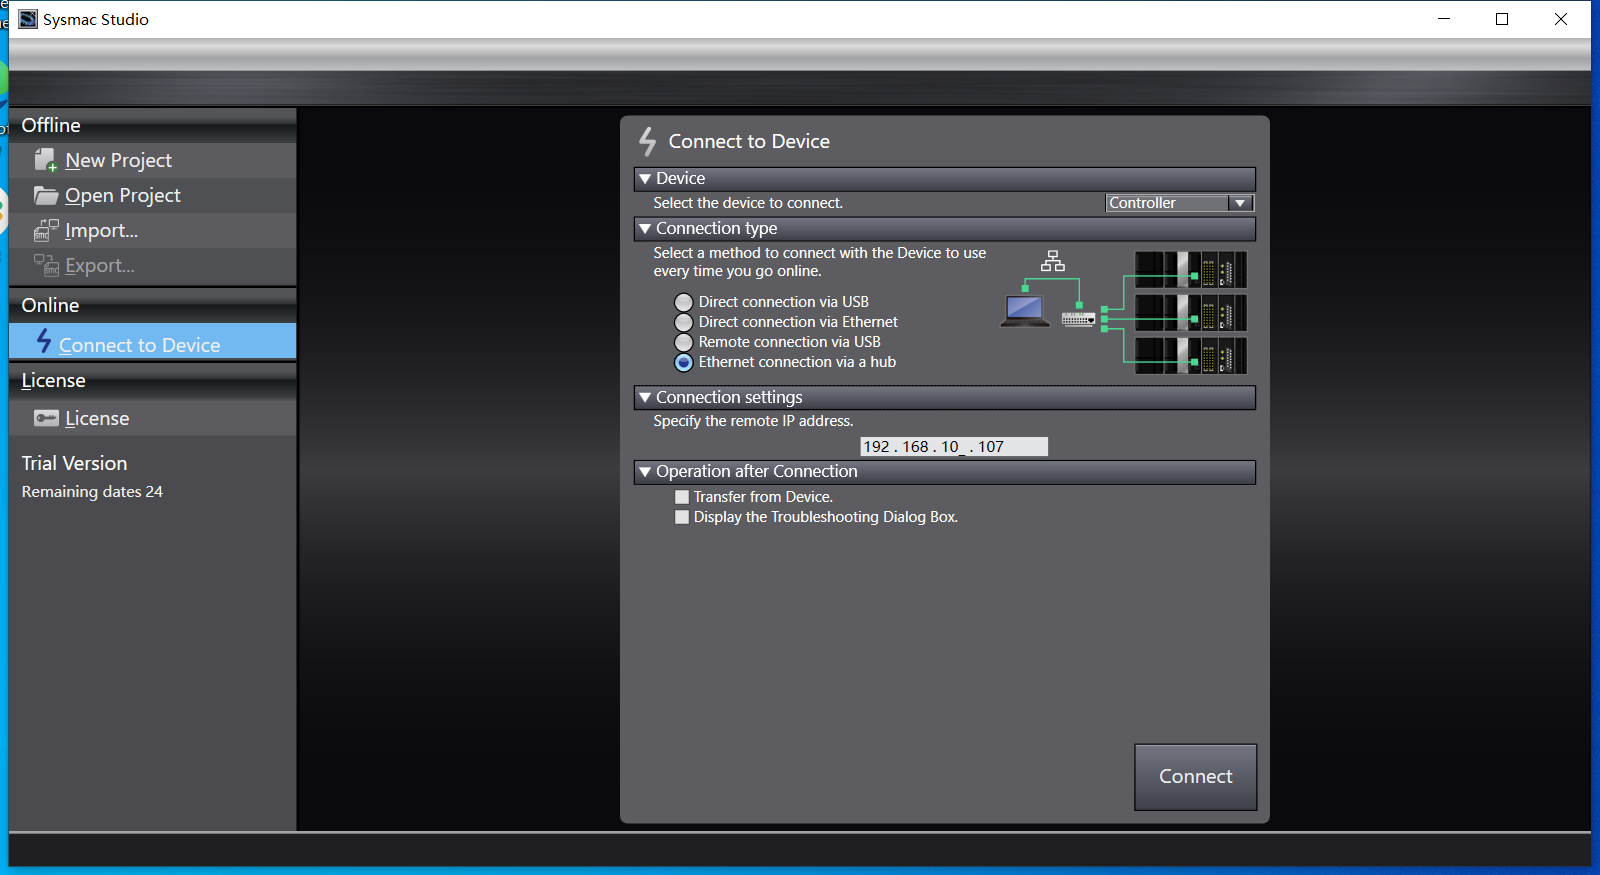
Select Connect to Device in the left menu bar to open the PLC connection settings window. Select the Device tab, and select the Controller option to connect to. Select the Ethernet-Hub Connection type, and set the PLC IP address. After setting the connection settings, click the Connect button. The device settings page is shown in the following figure.

After successfully connecting, we are now on the project page and select Controler -> Transfer -> From Controller. Based on the popup message, execute the default action.
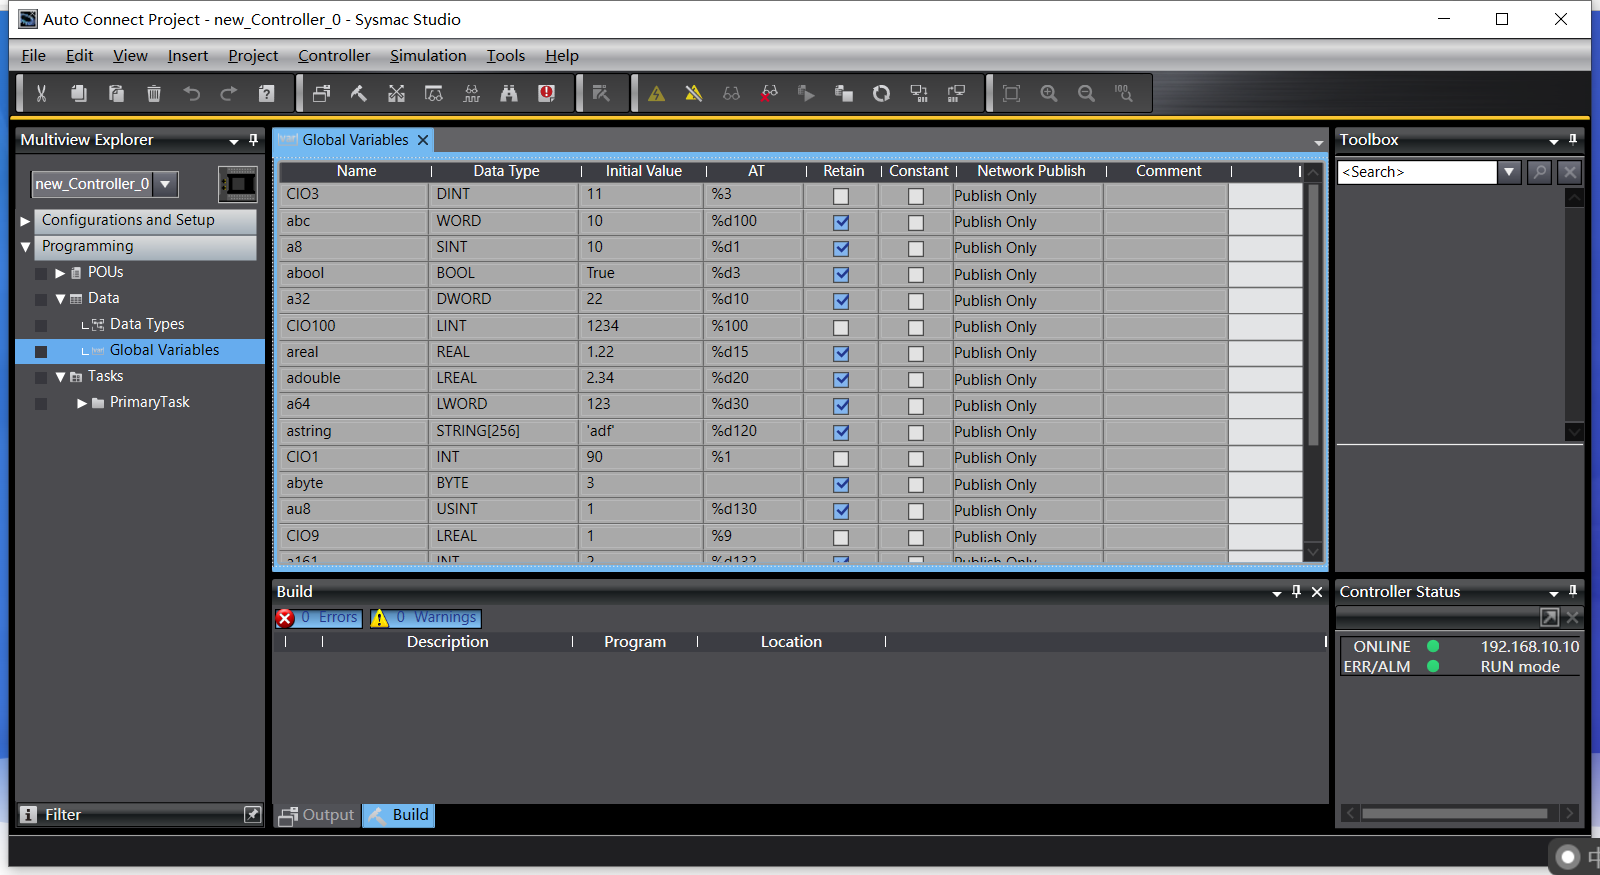
Select Programming -> Data -> Global Variables in the left menu bar, and then select Edit with the right mouse button. The window will display the current position information of the PLC. The following figure illustrates this.

Sysmac Studio is currently online and cannot be used for editing of point positions. Enter the menu Controller -> Offline, and enter editing mode. Right-click on the point table and use the context menu to perform corresponding editing operations. After editing is completed, enter the menu Controller -> Online, connect to the PLC, and then enter the menu Controller -> Transfer -> To Controller. Default action is executed based on the popup notification. The editing result of the point table will be written to the PLC.
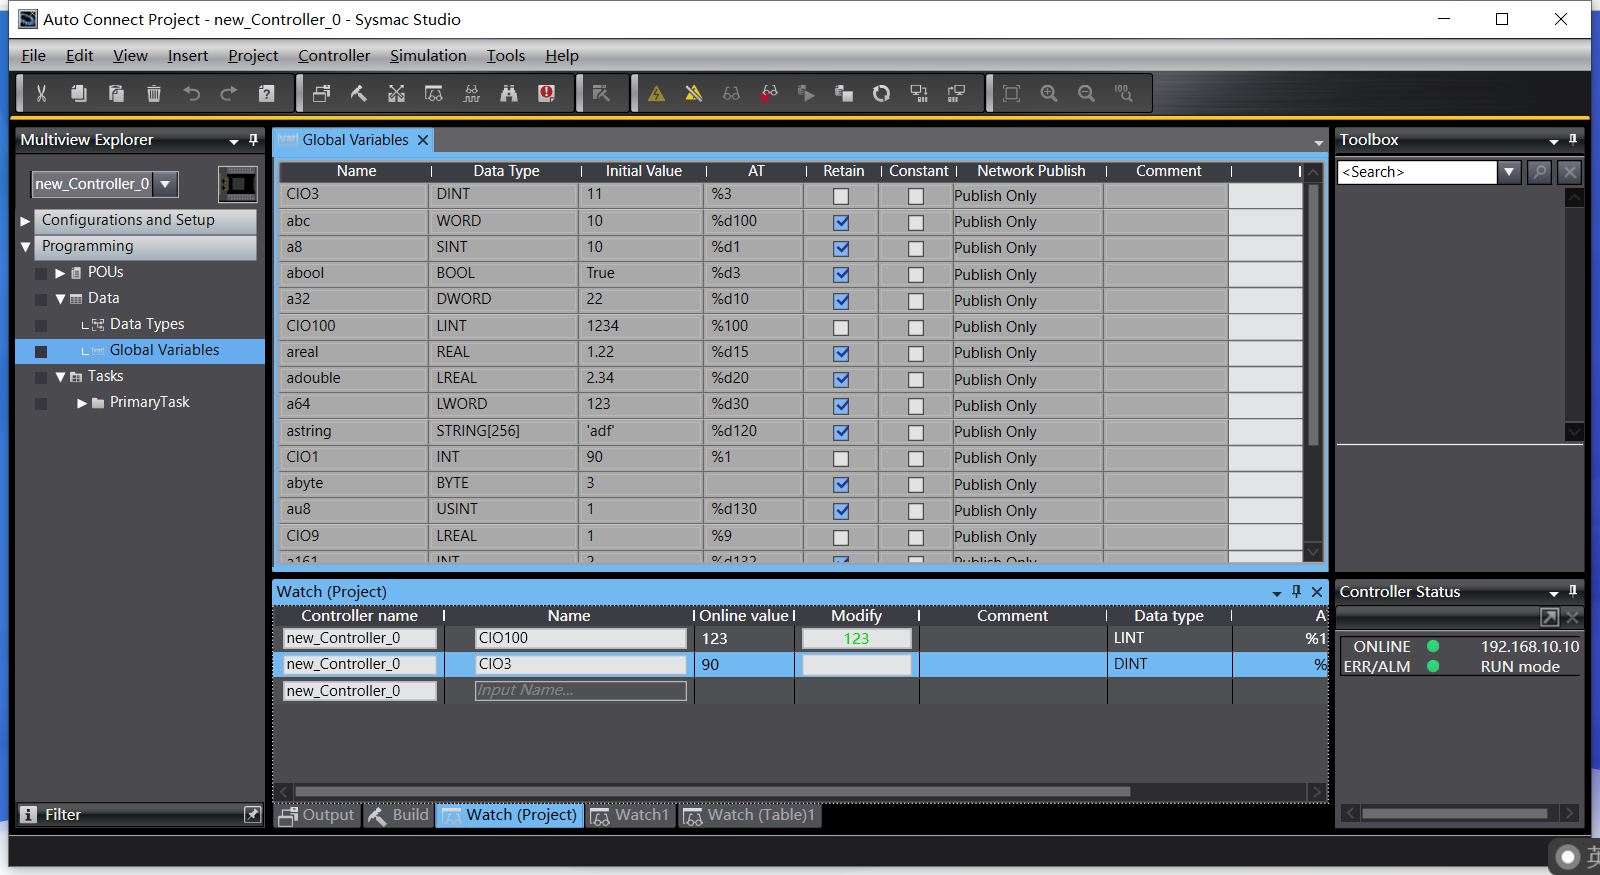
Sysmac Studio is currently online, enter the menu View -> Watch Tag Page, select Watch (Project) in the window, and enter the name of the point position to monitor real-time data and modify point position data. The following figure illustrates this.

Configure Neuron
- In Neuron, click Configuration -> South Devices. Click on Add Device in the South Devices and select the Omron FINS UDP plugin to create a node to connect to the NX1P PLC.
- After creating the node, click on Device Configuration to enter the device configuration page. Configure the node information according to the actual situation,
- Equipment Type: PLC equipment type
- PLC IP Address: PLC device IP address
- PLC Port: PLC device port, the default is 9600
- In the created south-device node, create a group and create some point positions under the group.
Data Monitoring
After completing the point configuration, you can click Monitoring -> Data Monitoring to view device information and control devices. For details, refer to Data Monitoring.